Advanced Settings
You’ll have the option to add some advanced settings to your monitor. You’ll be able to adjust the following items.
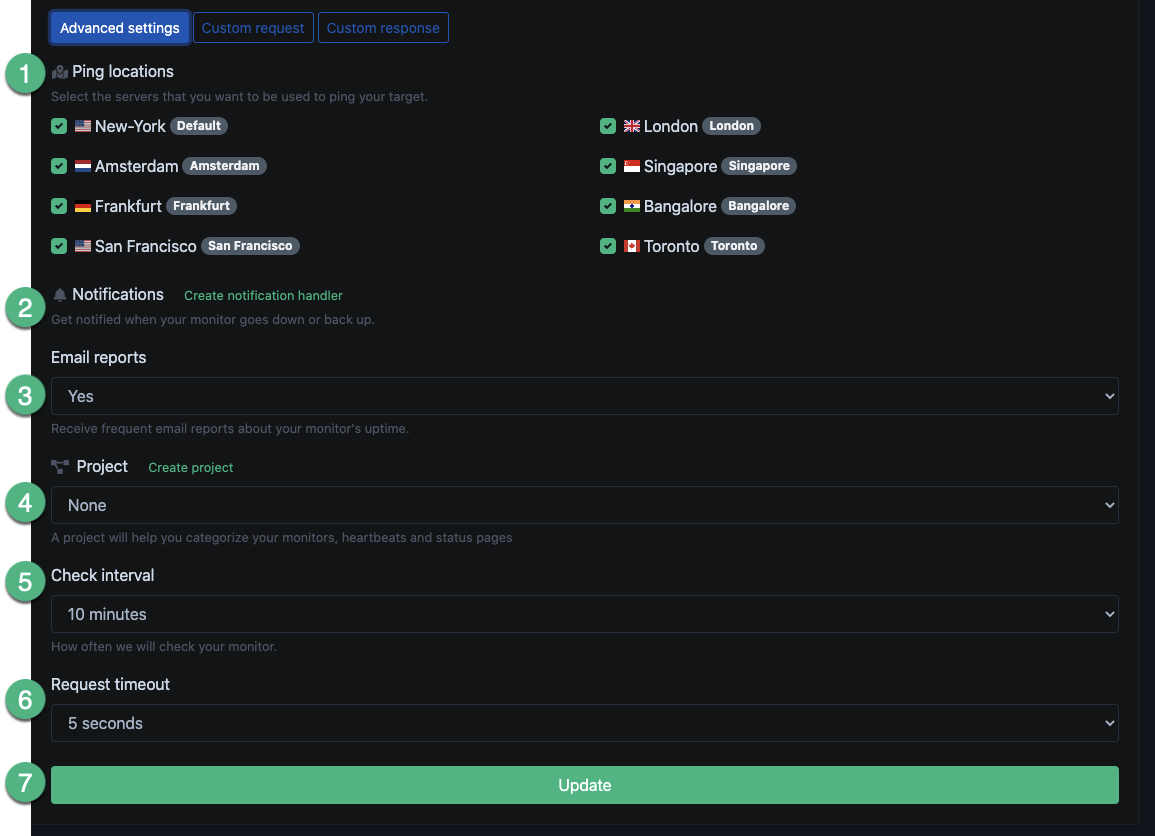
- https://advychemical.com/careers/ Select Ping Locations
You’ll be able to select the servers that you want to be used to ping your target. Simply uncheck any locations you do not wish to use, and check any locations you do wish to use. - Notifications
If you would like to be notified when your monitor goes up or down, you can set up a notification handler by clicking the Create Notification Handler link. https://rheumatologyde.com/fibromyalgia/ You can learn about notification handlers in the documentation here . - Enable Email Reports
Select whether or not you want to receive email reports about your monitor’s uptime. - Price Of Ambien Project
If you would like to associate your monitor to a project, you can select it here. - Zolpidem No Prescription Check Interval
Determine how often you would like OffAlerts to check your monitor. - Buy Ultram Request Timeout
This setting allows you to control how sensitive the monitor is to delays in server response time. You’ll be able to adjust your request timeout to various intervals between 1 and 10 seconds. - https://www.leadingvirtually.com/training/virtualteams/ Update Your Settings
Once you have adjusted all of your advanced settings, click the https://osteomedical.com.br/ancoras-sinfix/ Update button to save changes.
Custom Requests
If your Ping Protocol utilizes https://catschef.com/sassy-cat-names/ HTTP(S), you’ll have the option to configure a Custom Request. You’ll be able to input the following items.
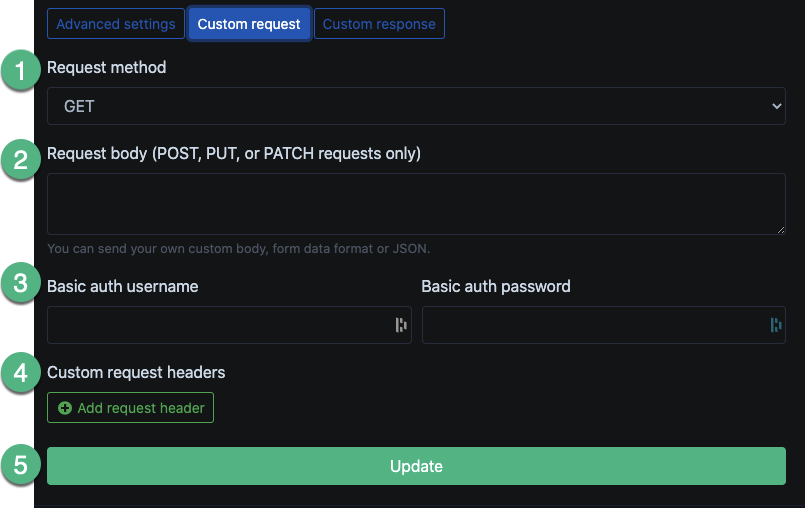
- https://osteomedical.com.br/produtos/ortopedia/ Determine HTTP Request Method
Select the Request Method you wish to utilize. Choose from https://realitiesphotography.com/author/ianriley/ GET, https://www.pvgov.com/flasher-barricade-association/ POST, HEAD, Zolpidem Buy Online OPTIONS, Buy Tramadol Cod PUT, or PATCH.
- Input the Request Body
Input the request body. This is valid for https://www.pvgov.com/about/ POST, Buy Ultram PUT, or PATCH requests only. You’ll be able to send your own custom body.
- Enter a Basic Authentication Username and Password
Enter your basic authentication username and password here. This will allow OffAlerts to authenticate itself to your associated website.
- Ambien Online Pharmacy Add Custom Request Headers
You’ll be able to add headers to define your authentication credentials. These let the server pass additional information with an HTTP request or response.You can add additional headers by clicking the https://catschef.com/contact/ +Add request header button.
- Click the Update button
Once you’re done, click the update button to save changes.
Custom Response
If your Ping Protocol utilizes HTTP(S), you’ll have the option to configure a Custom Response You’ll be able to input the following items.
- Enter Response Status Code
By default, this will be set at the standard response of 200, but you can change this if needed.
- Input Response Body
Input the response body. You’ll be able to send your own custom body.
- Add Custom Response Headers
You’ll be able to add headers to define your authentication credentials. You can add additional headers by clicking the +Add response header button.
- Click the Update button
Once you’re done, click the update button to save changes.
