Order Ambien Without A Prescription A status page is an easy to configure public page that can display data from multiple status pages. After creating a status page, you’ll have the option to access a QR code for it.
https://clinicacampus.com/rayos-x/Tramadol Prices This QR code is meant to be downloaded, printed and placed onto where your status page customers can see and access it. You’ll be able to edit the appearance of this QR code. Follow the steps below to access the QR code for your desired Status Page.
Ambien Cr Buy Online http://palmspringshamfest.com/speakers/ Step 1: Navigate to the Status Page
https://www.pvgov.com/about/Order Ambien Online 1.1 Once on the Status Page, find the status page you wish to access the QR code for. Navigate to the Actions Bar button near the top right corner. Click into it and find the https://dradrianomastologia.com/profiles/ QR Code button. Click it.
Buy Ambien 10 Mg
Buy Soma Online Overnight Step 2: View and Edit Your QR Code
Buy Carisoprodol Online You’ll have the option to edit certain aspects of your QR code. All of these actions are optional.
Zolpidem For Sale Online
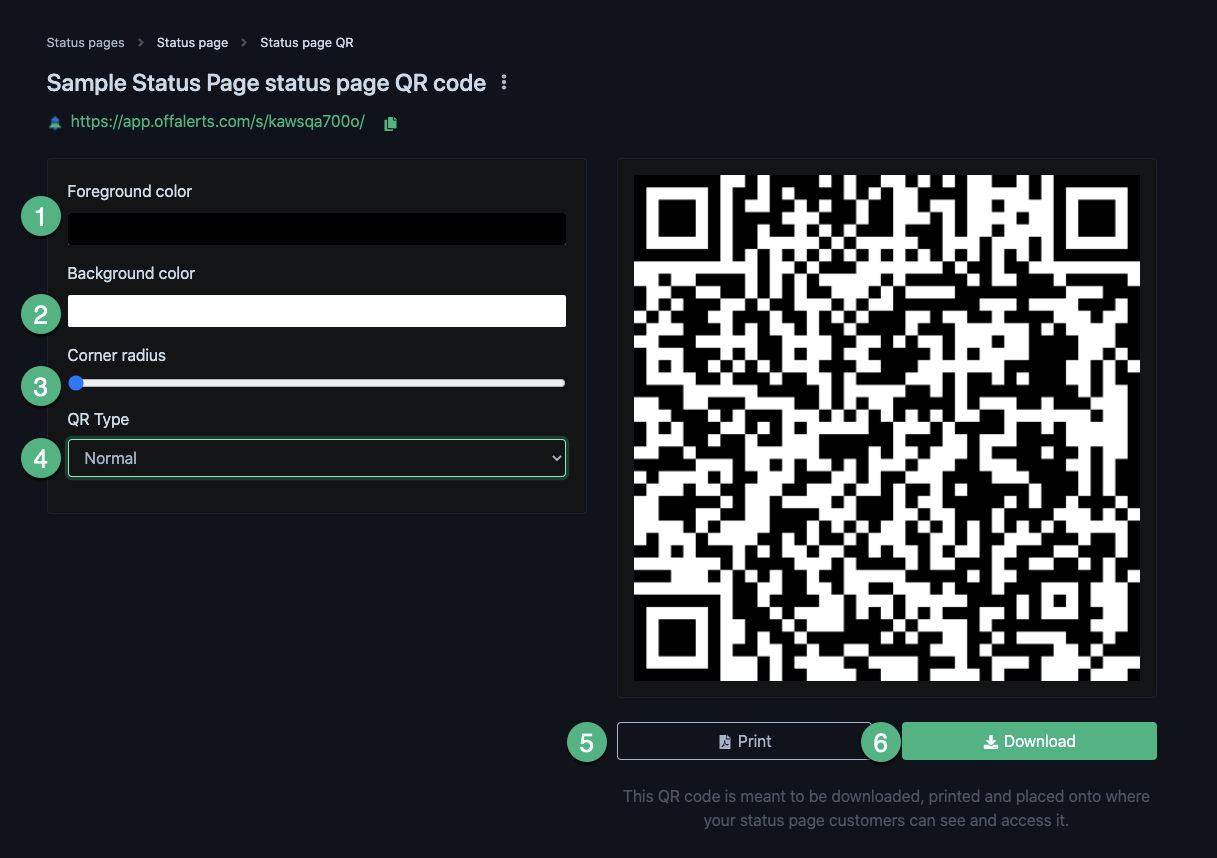
Get Ambien Online 2.1 Change the foreground color of the QR code.
2.2 Change the background color of the QR code.
2.3 You’ll be able to adjust the corner radius of the QR code. Increasing the radius will cause the squares within the QR square to become more curved.
2.4 You’ll be able to adjust the QR Type. You can choose from:
- https://www.brigantesenglishwalks.com/c2c/ Normal: This is the standard QR appearance you see initially on screen.
- Insert Custom Text: You’ll be able to insert text in the middle of the QR code. YOu’ll also be able to adjust the text color and text size.
- Ambien Online No Prescription Insert Custom Logo: You’ll be able to insert an image in the middle of the QR code. You’ll be able to adjust image size.
Cost Of Ambien 10 Mg 2.5 Click this button to receive a printable version of your QR code.
2.6 Click this button to download your QR code as a PNG file.